Updated: 2026-04-07
For: V5SI AI Extension Users on Photoshop
Note: This application is released free of charge to everyone. The application inherently uses Google’s AI servers, and some features are optimized for effective use within Photoshop.
Due to the use of Google AI, users still incur costs for AI processing. The application offers 2 modes: API or Credit.
- API: Users input their own API key, must create the API, link payment information, and pay Google directly. API users may be limited by Google’s policy on the daily number of image generations.
- Credit: Usage is handled via the V5SI company’s payment gateway and API. This means V5SI acts as an intermediary for payment to Google, and users are not limited in the number of image generations by Google’s policy with V5SI. Additionally, using credit allows access to exclusive features developed specifically for the V5SI – CAV Studio team.
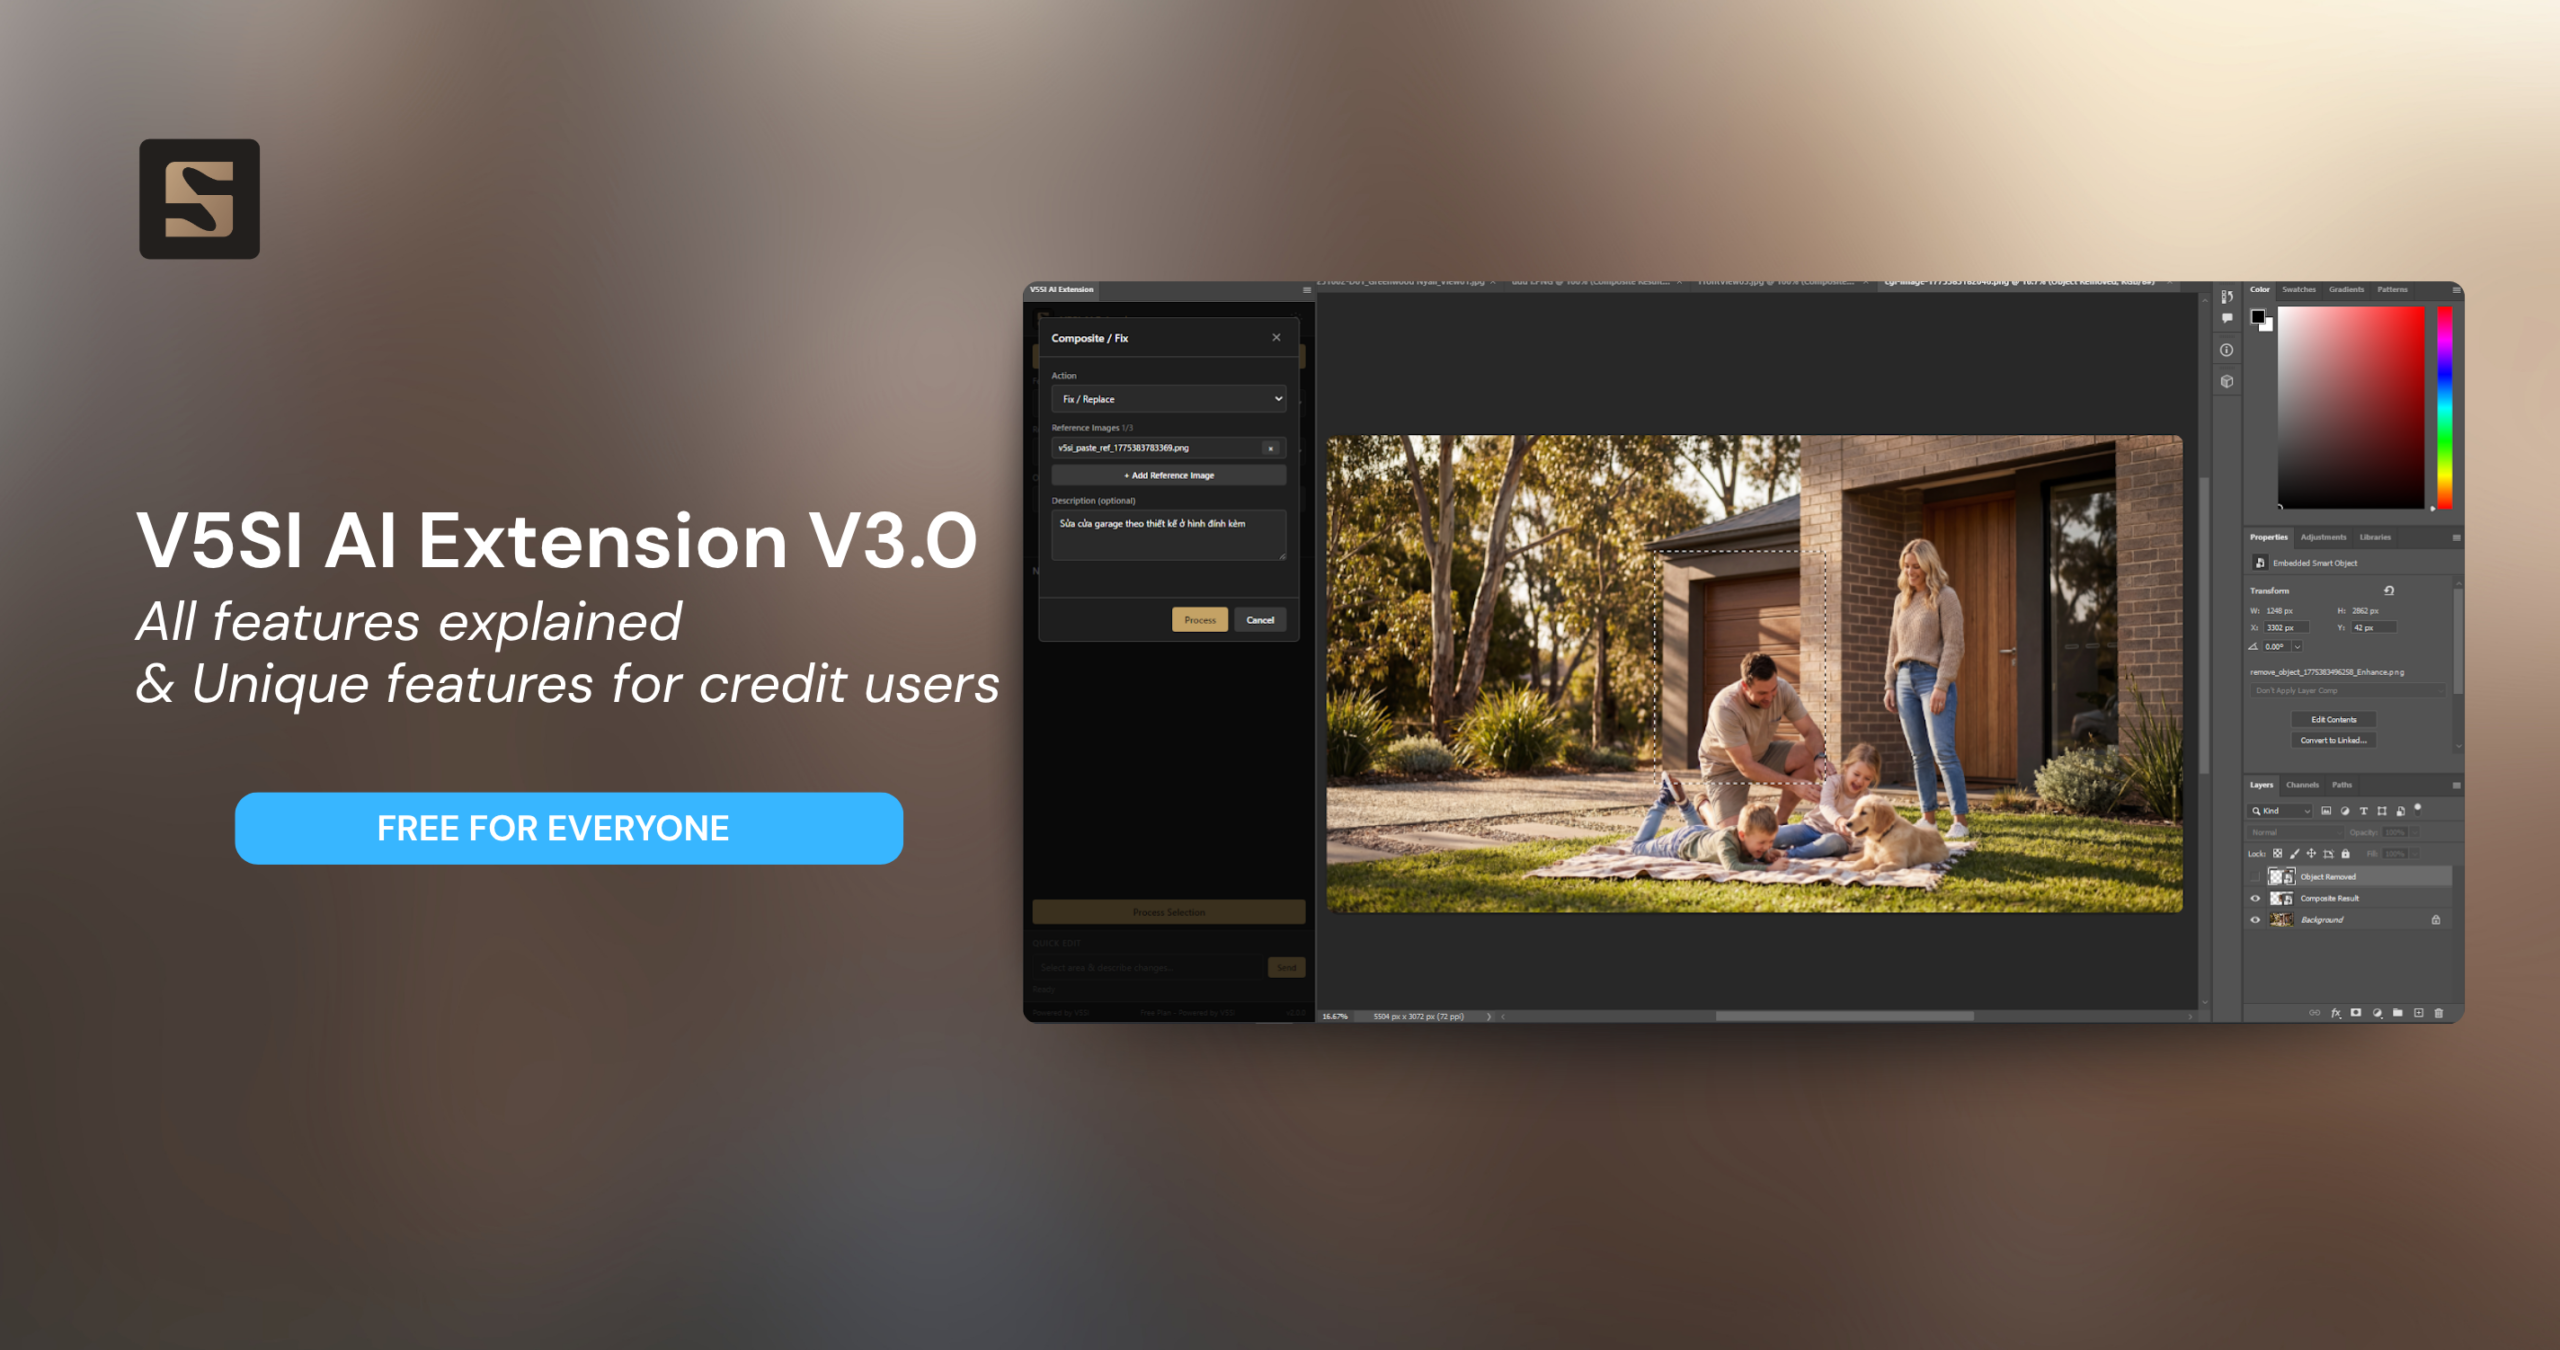
Version 3.0 is ready and upgraded for credit users.
OVERVIEW
How it Works
In each processing cycle, the AI receives 2 images:
| Image 1 (PNG) | Layer/selection you create | Primary Image – The AI processes this image |
| Image 2 (JPEG) | Entire Photoshop document | Context Image – The AI uses this to understand scale, lighting, and environment |
Two Ways to Create Processing Area
- Create Layer: For processing multiple areas in batches (Process All): Use the Marquee Tool to select an area → “Ctrl+J” to create a layer → Load Layers → Process All.
- Quick Chat: For quick processing of a single area: Use the Marquee Tool to select an area → enter the prompt into Quick Chat → Send.
General Notes
- Layer for the entire image: To process the whole image (e.g., Sketch to Render), use “Ctrl+A” (select all) → “Ctrl+J” (create copy layer) → Load Layers.
- Multiple layers: Select several different areas, use “Ctrl+J” to create one layer for each area, then Load Layers. The system will process them in parallel.
- Unique layer names: Use different layer names; the system will report an error if names are duplicated.
- You should load layers to control the image target in features that allow user direction.
Resolution Guide
The application allows you to select the output image size: 1k, 2k, or 4k. Choose the appropriate size based on your intended use.
DEFAULT FEATURES
Default Features
These two features are always available to all users, no extra installation required.
1. Enhance People
Purpose: Convert CG/3D people in renders into photorealistic people.
User Description: No input required; the AI processes automatically.
How to Create Selection
- Open the architectural render file containing 3D/CG people.
- Use the Marquee Tool (M) to select the area containing the people to enhance.
- “Ctrl+J” to create a layer for that area.
- Repeat for different groups of people in various locations.
- Load Layers → select Enhance People → Process All.
Result
The AI will maintain the pose, position, and outfit style but transform the people into photorealistic individuals with:
- Natural faces and lively expressions.
- Realistic skin and dynamic hair.
- Lighting and color matching the scene.
Recommended Resolution
- 1K: Quick testing, people far from the camera.
- 2K: Most scenarios, people in mid-shot.
- 4K: People in close-up, requiring clear facial detail.
2. Add People
Purpose: Add people to an empty architectural scene.
User Description: Mandatory – Detail the desired state and attire of the person to be added. The more detail you input, the more accurate the result.
How to Create Selection
- Open the architectural render file.
- Use the Marquee Tool to select the area where you want to add people (sidewalk, garden, corridor, etc.).
- “Ctrl+J” to create a layer.
- Load Layers → select Add People → enter description → Process All.
Result
- The added person is correctly scaled to the scene (The AI uses Image 2 full scene to calculate scale).
- Lighting and shadow matching the environment.
- Natural style, not appearing “pasted in.”
ADVANCED FEATURES
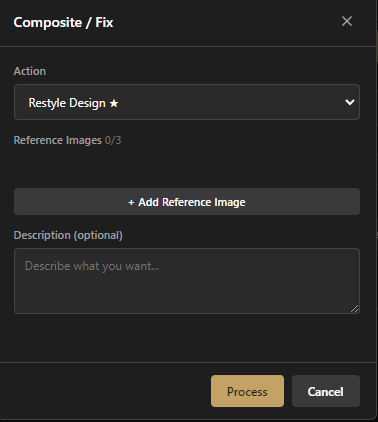
The features in this tab and Version 3.0 are exclusive to Credit users. They are indicated by a ★ in the dropdown.
Why the preference for Credit users?
- The volume of users utilizing the V5SI payment gateway strengthens V5SI’s partnership value with Google, leading to better mechanisms regarding speed and usage limits over time.
- We can receive promotions from Google for our AI usage journey and optimize it for our work.
3. Art Director Board
Purpose: Create a multi-angle board like a professional Art Director, presenting the architectural project with the best perspectives.
User Description: Optional – Enter instructions for the AI regarding the style and content of the board.
| Input Command | Meaning/Result |
| *(leave blank)* | Auto-create 6 panels, mixing exterior + interior |
| `focus on exterior` | All panels are exterior |
| `mix interior and exterior` | Combine both (interior and exterior) |
| `moody and dramatic` | Dark, cinematic, high drama style |
| `6 options` | Exactly 6 panels |
| `4 panels, focus on entrance and pool` | 4 panels focusing on the entrance and pool |
| `8 options, tropical resort feel` | 8 panels with a tropical resort style |
Result
A composite image containing multiple panels:
- 1 largest hero panel (best image)
- Secondary panels displaying different views
- Editorial layout like a high-end architectural magazine
- No text/labels on the image
4. Lighting Mood Board
Purpose: Compare the same architectural scene under various lighting conditions to help select the most suitable mood.
User Description: Optional – Specify the number and type of lighting.
| Input Command | Meaning/Result |
| *(leave blank)* | Default 4 panels: golden hour, twilight, overcast, night |
| `2 daylight options` | 2 panels, both daylight but different moods |
| `3 sunset variations` | 3 different sunset panels (golden, pink/purple, dramatic) |
| `warm lighting only` | All panels use warm light |
| `6 different times of day` | 6 panels from morning till night |
| `night and twilight` | Only night and twilight variations |
Result
A composite image containing panels:
- Each panel is the same scene, same camera angle but with different lighting
- Materials react correctly to each type of light
- No text/labels — image only
5. Camera Angle Study
Purpose: Create a board with various camera angles of the same building – study the best viewing angle.
User Description: Optional – Specify the exact camera angle and number of panels.
| Input Command | Meaning/Result |
| *(leave blank)* | Default 4 panels: street-level, elevated 3/4, interior view, detail close-up |
| `closeup armchair` | Detail close-up of an armchair |
| `lifestyle view focused on sofa` | Eye-level view, sofa as the hero |
| `pool view from bedroom` | Specific view from the bedroom towards the pool |
| `3 options` | Exactly 3 panels |
| `6 closeup details` | 6 detail close-up images |
| `2 exterior + 2 interior` | 4 panels: 2 exterior + 2 interior |
Result
A composite image with an editorial layout:
- 1 larger hero panel (best camera angle)
- Secondary panels displaying different angles
- Each panel is an independent image, not stretched/distorted
- Consistent building design throughout
6. Sketch to Render
Purpose: Transform a screenshot from 3D software (SketchUp, 3ds Max, Rhino, Revit…) into a high-quality photorealistic render.
User Description: Optional – Specify the lighting mood.
| Input Command | Meaning/Result |
| *(leave blank)* | AI automatically selects the best lighting for the architecture |
| `golden hour` | Sunset, warm golden light, long shadows |
| `blue hour` | Twilight, dark blue sky, interior lights on |
| `overcast` | Gloomy sky, soft light, no hard shadows |
| `rainy` | Wet road reflections, rainy atmosphere |
| `bright morning` | Early morning, clear, crisp light |
| `night` | Nighttime, architectural + interior lights are the focus |
| `tropical, warm` | Tropical style, warm tones, lush green |
| `golden hour with dramatic clouds` | Combination: golden hour + dramatic clouds |
Result
- Photorealistic image maintaining accurate architectural geometry (position of doors, roof, walls, columns…)
- Flat materials converted to realistic materials (stucco, wood, glass, wrought iron…)
- Adds foliage, people, vehicles, sky — creating a lively scene
- Quality equivalent to MIR / DBOX studio
7. Sketch to Photo
Purpose: Transform a 3D screenshot into a real photograph — as if an architectural photographer took a picture of the finished building.
User Description: Optional – Specify time of shooting, weather.
In addition to the lighting options similar to Sketch to Render, this feature supports:
| Input Command | Meaning/Result |
| `after rain` | Wet road reflections, puddles, damp surfaces |
| `foggy morning` | Fog coverage, reduced long-distance visibility |
| `dramatic clouds` | Dramatic clouds as the backdrop for the building |
| `harsh midday sun` | Harsh midday sun, strong contrast, deep shadows |
| `warm and inviting` | Warm tones, approachable, friendly |
Difference from Sketch to Render
| Sketch to Render | Sketch to Photo | |
| Style | High-end Archviz render | Real photograph taken by a camera |
| Materials | Perfect, clean | Shows signs of weather, natural aging |
| Foliage | Beautiful, complete plants | Real plants with fallen leaves, moss, natural look |
| Streetscape | Clean and neat | Shows wear, tire marks, realistic deterioration |
| Feel | “Beautiful render” | “Real photograph, building has been constructed” |
8. Sketch to Luxury Photo
Purpose: Transform a 3D screenshot into a luxury resort/villa style photo — warm tones, tropical, like a Condé Nast Traveller magazine.
User Description: Not required – AI automatically selects the best luxury mood.
Result
- Warm tones throughout (golden, amber, honey)
- Natural materials: rough stone, tropical wood, thatched roof, stucco
- Rich tropical foliage: palms, plumeria, bougainvillea, ornamental banana
- Turquoise blue pool water
- Lifestyle styling: candles, towels, books, sun loungers
- 1-3 people (optional) relaxing in the space
When to use this feature instead of Sketch to Render?
- Resort, villa, hospitality projects → use Sketch to Luxury Photo.
- Townhouse, apartment, public works projects → use Sketch to Render or Sketch to Photo.
9. GMap to Realistic Photo
Purpose: Transform a Google Maps / Google Earth screenshot into a real site photo — used as a background plate for photomontage.
User Description: Optional – Specify the time of day.
| Input Command | Meaning/Result |
| *(leave blank)* | Default: clear sky, late morning ~10am |
| `early morning` | Early light, long shadows from the east |
| `midday` | Midday sun, short shadows, high contrast |
| `golden hour` | Sunset, warm tones |
| `overcast` | Gloomy sky — ideal for photomontage because it’s easy to composite renders |
| `afternoon 3pm` | Afternoon, medium shadows |
Result
- Photorealistic site image – ready to use as a background plate
- Consistent lighting for 3D artists to easily match the render
- No overly strong effects (god rays, flare) – maintains neutrality
- Suitable for compositing with V-Ray, Corona, Enscape renders
10. 2D Floorplan to 3D Floorplan
Purpose: Transform a 2D floor plan (CAD, hand-drawn, PDF) into a high-quality 3D floor plan visualization.
User Description: Optional – Specify viewing angle, style, material.
| Input Command | Meaning/Result |
| *(leave blank)* | Default: 45° angled view, modern contemporary, warm wood floor |
| `top-down` | Straight 90° overhead view |
| `angled` or `isometric` | ~45° angled view (shows wall height) — most common |
| `modern, marble floor` | Modern style, marble floor |
| `Scandinavian, bright` | Scandinavian style, bright tones |
| `luxury, dark mood` | Luxury, dark tones |
| `warm afternoon lighting` | Warm afternoon light |
| `Angled perspective, warm tones, wooden flooring` | Combination: angled view + warm tone + wood floor (Vietnamese OK) |
2 Types of Viewing Angles
| Viewing Angle Type | Characteristic | Related Commands |
| Top-down | Straight overhead view, walls appear as lines | `top-down`, `overhead view, `bird’s eye` |
| Angled (Default) | 45° angled view, shows wall height, looks like an open dollhouse | `angled`, `isometric`, angled view, `perspective` |
Result
- All rooms, walls, doors, and furniture are correctly positioned according to the 2D drawing
- Windows/doors only appear where indicated in the drawing (AI does not add them automatically)
- Natural light enters through windows + ceiling and table lamps
- Quality equivalent to 3ds Max + V-Ray render
11. Social Graphic Design
Purpose: Create professional social media graphic designs from an architectural image + text.
User Description: Mandatory – The exact text content to be displayed on the design.
User Description – What to Enter?
Enter the exact text content you want to display. The AI will use every character precisely, without adding or removing anything:
Example 1 – New Project:
LUMIÈRE RESIDENCES
Where Light Meets Living
Grand Opening 2026
Example 2 – Studio Advertisement:
V5 STUDIO
Architecture & Interior Design
Example 3 – Single Line:
Now Accepting Reservations
Text Rules
First line → AI interprets as the headline (large, prominent)
- Subsequent lines → subheading (smaller, supporting)
- Blank line between blocks → AI places them in different positions
- The AI does not add hashtags, slogans, URLs, or any other words
Result
- Professional graphic design at an agency level ($5,000/project)
- Creative typography, asymmetrical layout, color palette derived from the image
- Each generation yields different results (layout, color, style)
- Suitable for direct posting on Instagram, Facebook, LinkedIn
12. Elevate Archviz
Purpose: Upgrade an existing render/screenshot to a world-class level – maintaining the camera angle, but enhancing everything else (lighting, materials, foliage, atmosphere).
User Description: Optional – Specify the desired lighting mood.
| Input Command | Meaning/Result |
| *(leave blank + render with lighting)* | Maintain current mood but elevate to cinematic level |
| *(leave blank + screenshot/clay)* | AI automatically selects the best lighting |
| `golden hour` | Dramatic sunset |
| `dramatic storm light` | Storm light, powerful, dramatic |
| `soft overcast` | Gentle, subtle, highlights material details |
| `night with warm interior` | Nighttime, warm interior lighting |
| `dappled light through trees` | Light filtering through tree canopies |
Difference from Sketch to Render
| Sketch to Render | Elevate Archviz | |
| Input | 3D software screenshot | Anything: screenshot, clay, WIP render, near-final render |
| Criteria | Convert to photorealistic | Elevate everything to award-winning level |
| Creativity | Controlled, adheres to reference | Bold, pushes further, more cinematic, dares to be different |
| What is Added | Foliage, people, street life | Foliage, people, foreground depth, framing, leading lines, atmospheric effects |
| Suitable For | “I want a standard render” | “I want a WOW image, MIR/DBOX level” |
Result
- Camera angle is maintained — same position, same viewing direction.
- Architecture is maintained — same geometry, same proportions.
- Everything else is upgraded: Cinematic lighting, tangible materials, lush foliage, lively people, deep atmosphere, depth in composition.
- The image no longer looks like a render — but like a real photograph.
13. Relight & Landscape
Purpose: Change the lighting + overhaul the entire surrounding foliage/landscape of the architectural render while keeping the building intact, completely refreshing the environment.
User Description: Optional – Specify the desired lighting condition.
| Input Command | Meaning/Result |
| *(leave blank)* | Default: sunny afternoon, interior lights off, strong light/shadow contrast |
| `sunny afternoon` | Afternoon sun, clear shadows, interior lights off |
| `golden hour` | Warm sunset, dramatic long shadows |
| `overcast` | Gloomy sky, soft light, no hard shadows |
| `bright morning` | Early morning, clear tones |
| `blue hour, interior lights on` | Twilight, warm interior lights on |
Special Rule: Interior Lights
- If you select daytime (sunny, morning, afternoon) → AI automatically turns off artificial interior lights, allowing natural light bounce.
- If you select evening/night (golden hour, blue hour, night) → interior lights are naturally illuminated.
Result
- Architecture + hardscape (pool, stairs, walkways) remain 100% intact.
- Rich, resort-style foliage: tropical broadleaf, ground cover, large surrounding trees.
- Entirely new lighting according to request, accurate shadow casting.
- Photorealistic quality, sharp detail.
14. Material & Render Upgrade
Purpose: Change the entire material palette of the architecture to a new, more luxurious one + upgrade the lighting — answering the question “Can it look better?”
| Input Command | Meaning/Result |
| *(leave blank)* | AI automatically suggests a new luxury material palette + upgrades lighting according to the current time in the image |
| `dark stone facade` | Luxury dark stone facade |
| `bronze metal cladding` | Bronze metal cladding |
| `travertine + warm wood` | Travertine stone combined with warm wood |
| `make it night` | Change entirely to nighttime + new materials |
| `sunny afternoon` | Change lighting + materials |
| `high-tech glass and steel` | High-tech style, glass + steel |
| `luxury concrete with timber accents` | High-end concrete + timber accents |
Result
- Camera angle + architectural geometry remain 100% intact.
- Completely new materials — clearly different from the input.
- Lighting is upgraded to match the time in the image (daytime: lights off, strong contrast; nighttime: warm lights, dramatic reflection).
- Surrounding environment is also upgraded.
- High-end architectural magazine quality.
15. Enhance Quality
Purpose: Upgrade render quality, transforming “CG-looking” elements (plastic trees, flat materials, 3D people) into photorealistic ones, while keeping everything else intact.
User Description: Not required; AI automatically detects and upgrades CG elements.
AI Automatically Detects and Upgrades
| Initial Element | Upgraded To |
| Stiff, low-poly 3D trees | Photorealistic real trees, translucent leaves, natural variation |
| 3D/CG People | Real people: skin, hair, natural fabric folds |
| Flat, obvious tiling materials | Materials with depth: micro-roughness, grain, displacement |
| “Plastic” lighting | Natural bounce light, ambient occlusion, micro-shadows |
Result
- All positions remain unchanged – no objects are added, removed, or moved.
- Foliage, people, and materials are upgraded from CG → photorealistic.
- Lighting is refined: removes “plastic look,” adds natural bounce light.
- The image completely loses the “computer-generated” feel.
Version 3.0 – READY TO USE
Exclusive Features for Credit Users

- Automated setup of a standardized layer system for a new Photoshop file.
- AI features (Render by reference, object editing, object addition…) utilizing an attached image reference mechanism.
- Generate mask groups from Render ID for efficient post-production in Photoshop for professional 3D Artists.
- Upscale x2, x4 via seed2vr, leveraging local machine computation.1
- Object removal within the selection area.
- Fast access to the Photoshop Library.
- Streamlined Workflow Logic:
- Features can be used easily without needing to load layers (Selection-only workflow).
- Multiple output versions (Ability to generate several image versions in a single process).
Improved user flow
- Object Removal Feature


- Object Editing Feature


- Design Style Change Feature
- Low-Quality Image Upscaling Feature

- Image Composition Feature


- Automatic mask group creation from ID or Wirecolor Channels

- Automatic layer system creation based on individual/corporate workflow standards
- Feature to remove the central object within the selection area
- Library setup and access feature

Download the latest version of V5SI AI Extension now
Follow V5SI
Follow us for updates on new releases, tutorials, and creative industry insights
- Website: https://v5si.com
- Facebook: https://www.facebook.com/v5sigroup
We are always eager to hear your ideas, feedback, and see the custom skills you create shared with the community. Reach out to us at info@v5si.com.